
What you need before getting started
- A standard gingerbread house kit
- A small knife (a sharp steak knife or paring knife will work just fine!)
- A cutting board or other flat surface
- Optional: holiday spirit and the intent to get cyber safe
Router instructions
Step 1
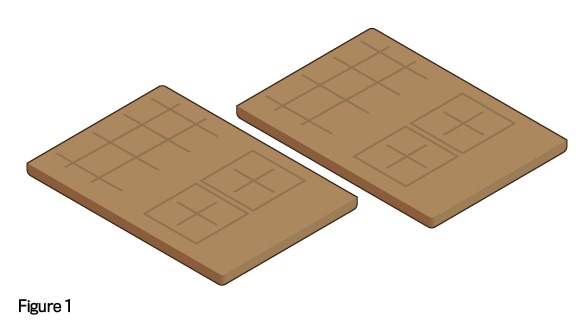
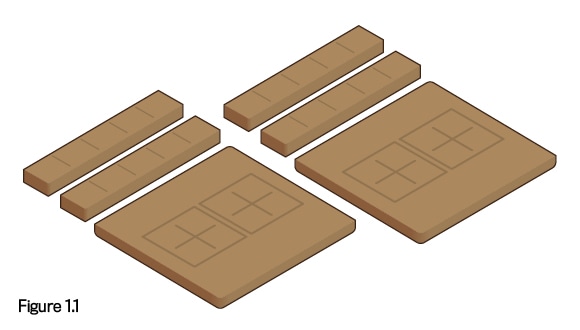
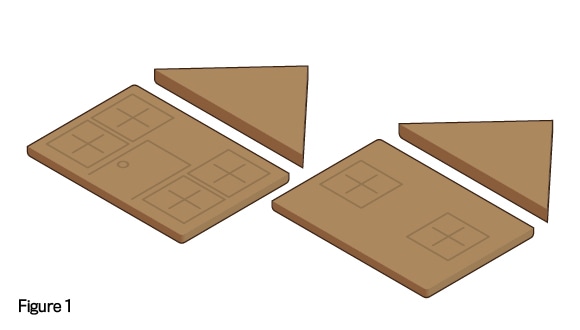
Remove all pieces from the gingerbread house kit. Find the two pieces that are intended for the sides of the house – they should have a pair of windows with two layers of bricks above them (Figure 1). Using your knife, carefully cut the bricks off by using long sawing motions width wise so you’re left with four strips (Figure 1.1). These will be your antennas and a bonus USB stick (or a quick snack if you need to refuel). Put the strips aside but keep the two bottom window pieces.
Step 2
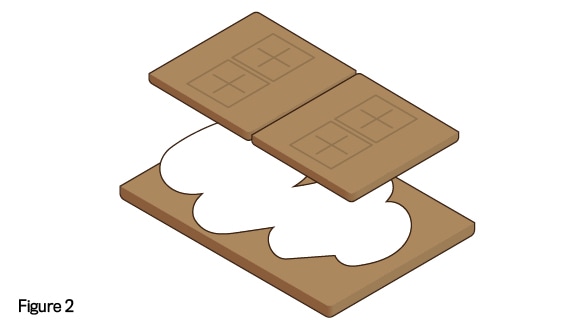
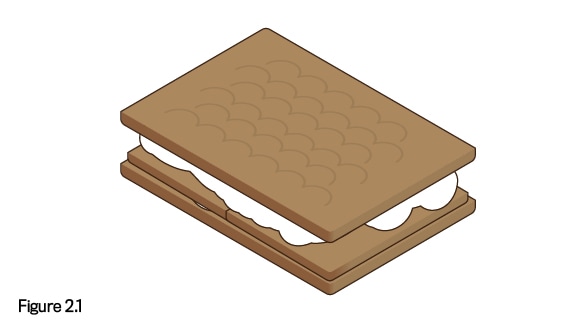
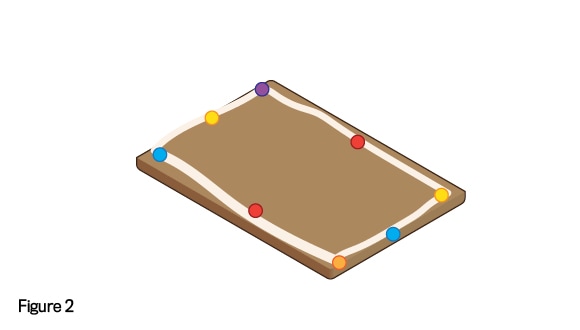
Find the two largest pieces that are meant for the roof of the house (Figure 2). Place them shingle side down and pipe a generous amount of icing all over the base of one of the roof pieces. Place the two bottom window pieces leftover from step one on top of the icing in the middle of the iced piece of roof (Figure 2.1). Pipe a generous amount of icing over the top of the two window pieces and then sandwich them by placing the other roof piece above them. This will be your router base. Allow icing to set for 30 - 60 seconds. While you wait for your icing to set, take a moment to log in to your actual home router and change the default password to something more secure. You can typically do this by entering your router’s IP address into your web browser and following the manufacturer instructions.
Step 3
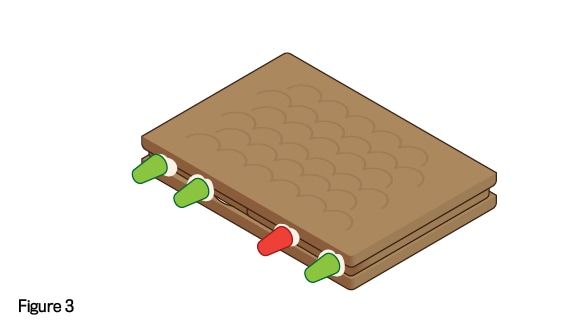
Open your bag of gum drops and take out three green and one red candy. Pipe a generous amount of icing along the width of one side of your router’s base (Figure 3). Allow 30 seconds for the icing to get sticky – which is exactly enough time to look at your phone (or other device) and see if it needs an update. Feel free to take this time to start the update or schedule it for later. Stick two green gum drops to the left of your router, followed by one red and one green gum drop to the right. These will be your lights.
Step 4
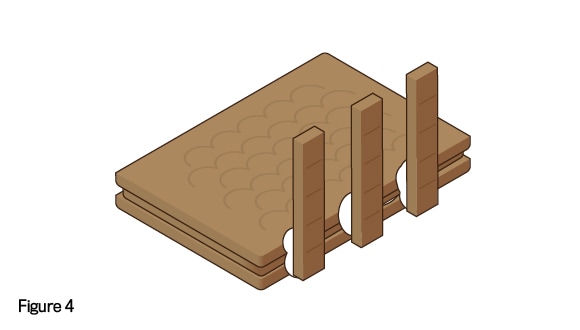
Find the brick strips that you cut out in step one. Rotate your router base so the gum drop side faces away from you. Pipe a generous amount of icing on the bottom two bricks of each strip and allow to dry slightly for about 30 seconds. Press one strip to the back right of the router base (Figure 4), and then repeat the steps by placing one to the left and one in the middle.
Congrats! Now that your gingerbread home network is set up securely, make sure your home network is too by setting up a guest network for your holiday visitors! Find more information on securing your home network.
Laptop instructions
Step 1
Find the two pieces meant for the front and back of the house. Using your knife, carefully cut above the top two windows on the cookie to remove the two triangle-shaped pieces using long sawing motions (Figure 1). Put the triangles aside for now.
Step 2
Take one of the remaining squares from step one and place it flat side up. Pipe a thin layer of icing around the edge of the square (Figure 2) and decorate it however you please using the smallest candy dots. This will be your laptop screen.
Step 3
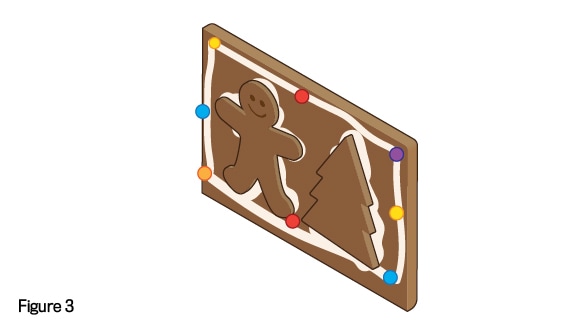
Find the person and tree shaped cookies and pipe a generous amount of icing on the back of them. Place them in the middle of the laptop screen (Figure 3) and allow them to dry for about two minutes, which is approximately how long it will take to set up multi-factor authentication (MFA) on one of your devices or accounts. Feel free to take as long as you need to scan your face or your fingerprint while the icing sets. But make sure to wash your hands first.
Step 4
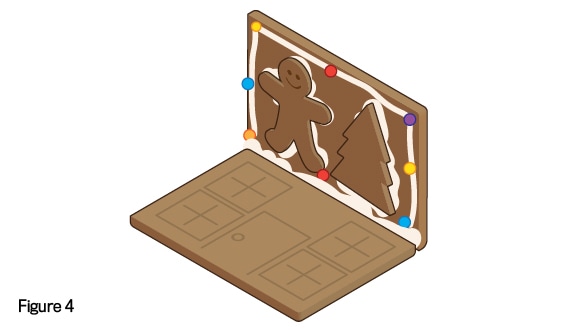
Pipe a generous amount of icing onto the bottom edge of the laptop screen (Figure 4), as well as the top edge of the remaining house piece from step one (flat side down) (Figure 4). Connect the two pieces and press them together on a flat surface for one to two minutes. This is usually the amount of time it takes to secure your devices by disabling your Bluetooth or location services if you aren’t using them, uninstalling old apps that you never use or enabling automatic software updates.
Step 5
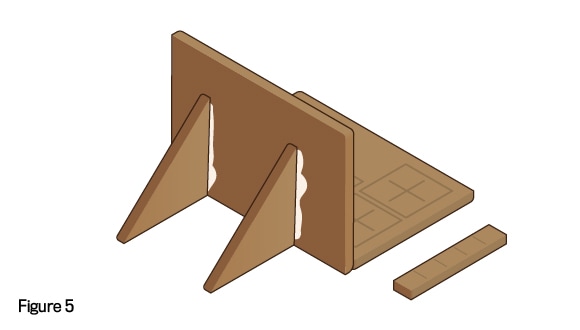
Find the two cut out triangles from step one and apply a generous amount of icing to one of the shorter sides with the rough, cut-off side facing up. Place it against the back of the laptop screen on one of the sides (Figure 5). Repeat these steps with the other triangle-shaped piece, sticking it to the other side of the laptop screen. You can now use your leftover strip from step one of the router instructions as a USB for your laptop (if you didn’t already eat it).
Congrats! While this laptop can’t connect to public Wi-Fi (or any kind of Wi-Fi, really), make sure you’re always using a VPN when you’re using your actual laptop in public places. Learn more about securing your connections.
Happy holidays from Get Cyber Safe!
We want to see your gingerbread home network kit. Take a picture of your creations and share it with us on social media by tagging @GetCyberSafe!